Installation on a local machine
It is important to note that there are minimum hardware requirements to be able to run the application depending on the tools to be used. Below is a table describing the different functions and their corresponding minimum requirements.
| Description | Requirements |
|---|---|
| Cataloging module: This functionality allows cataloging and organizing new resources based on a form described by the user. Processing must be limited to one at a time to avoid overloading the machine. | 4GB RAM |
| Advanced search with cross-referencing of information related to word processing, OCR, transcription and automatic labeling. | 16GB RAM |
Docker installation on the machine
Section titled “Docker installation on the machine”To install ArchiHUB on a local machine, it is necessary to have the Docker application installed on the operating system (either Mac or Windows). Docker is a tool that allows to virtualize the different services necessary for the correct operation of the archive. Throughout this guide, it will be shown how to use this tool to start up the archive, perform backups and update the tool.
Download ArchiHUB
Section titled “Download ArchiHUB”The ArchiHUB system is composed of two main components:
- Backend: An API that serves as the system’s foundation
- Frontend: An interchangeable component that can be adapted according to specific needs
Currently, there is a version of the frontend that manages all processing and file management tasks. However, this implementation does not limit the system, as it allows the development of custom interfaces according to each user’s requirements.
Installation preparation
Section titled “Installation preparation”This repository centralizes the different ways to install ArchiHUB. For our case, we will need the files located in the local-machine folder.
Important: Before starting, you must:
- Update the access keys
- Adjust security settings
This will ensure that the installation is secure and works correctly from the start.
Environment configuration
Section titled “Environment configuration”Follow these steps to prepare the environment:
-
Download the repository with installation scripts
Ventana de terminal git clone https://github.com/ArchiHUB-App/getting-started -
Go to the archihub folder
Ventana de terminal cd getting-started/local-machine/archihub -
Rename the .env.bak file to .env
Ventana de terminal mv .env.back .env
Make sure to adjust the following settings in this file so that everything works correctly:
- Line 7: MONGO_INITDB_ROOT_PASSWORD is the environment variable that assigns a password to the database.
- Line 11: ELASTIC_PASSWORD is the environment variable that assigns a password to the elasticsearch index.
- Line 29 and 30: SECRET_KEY and JWT_SECRET_KEY are for the application login keys.
- Line 31: FERNET_KEY is the key used to encrypt our API access keys.
Useful tools
Link to randomly generate a password.
Folder organization
Section titled “Folder organization”├── local-machine│ ├── archihub│ │ ├── frontend│ │ ├── backend│ │ ├── mongo_db│ ├── webfiles│ ├── userfiles│ ├── temporal│ ├── original│ ├── data│ │ ├── mongodb│ │ ├── elasticThe root folder consists of the following folders, if they don’t exist they must be created:
- archihub: in this folder we find the frontend code, the backend we must download or clone from the repository, and in mongo_db we find the initial configuration of the application to load into a fresh database installation.
- webfiles: ArchiHUB supports a wide variety of documents that you can upload without worrying about the format. To facilitate viewing and standardize formats, our tool takes care of generating web versions of the documents. This allows you to access and view your files consistently and smoothly, regardless of the original format.
- userfiles: this folder stores files generated by users, such as mass processing reports or inventories requested from the cataloging module.
- temporal: for some processing cases it is necessary to manipulate temporary files, this folder is used for that.
- original: the original files of the documents are stored here. They are stored in a temporary folder structure and the path of the original is the same as that of the web versions.
- data: this is the persistent data from both the database and the index. This folder is for system use only and should not be modified.
Download the application backend
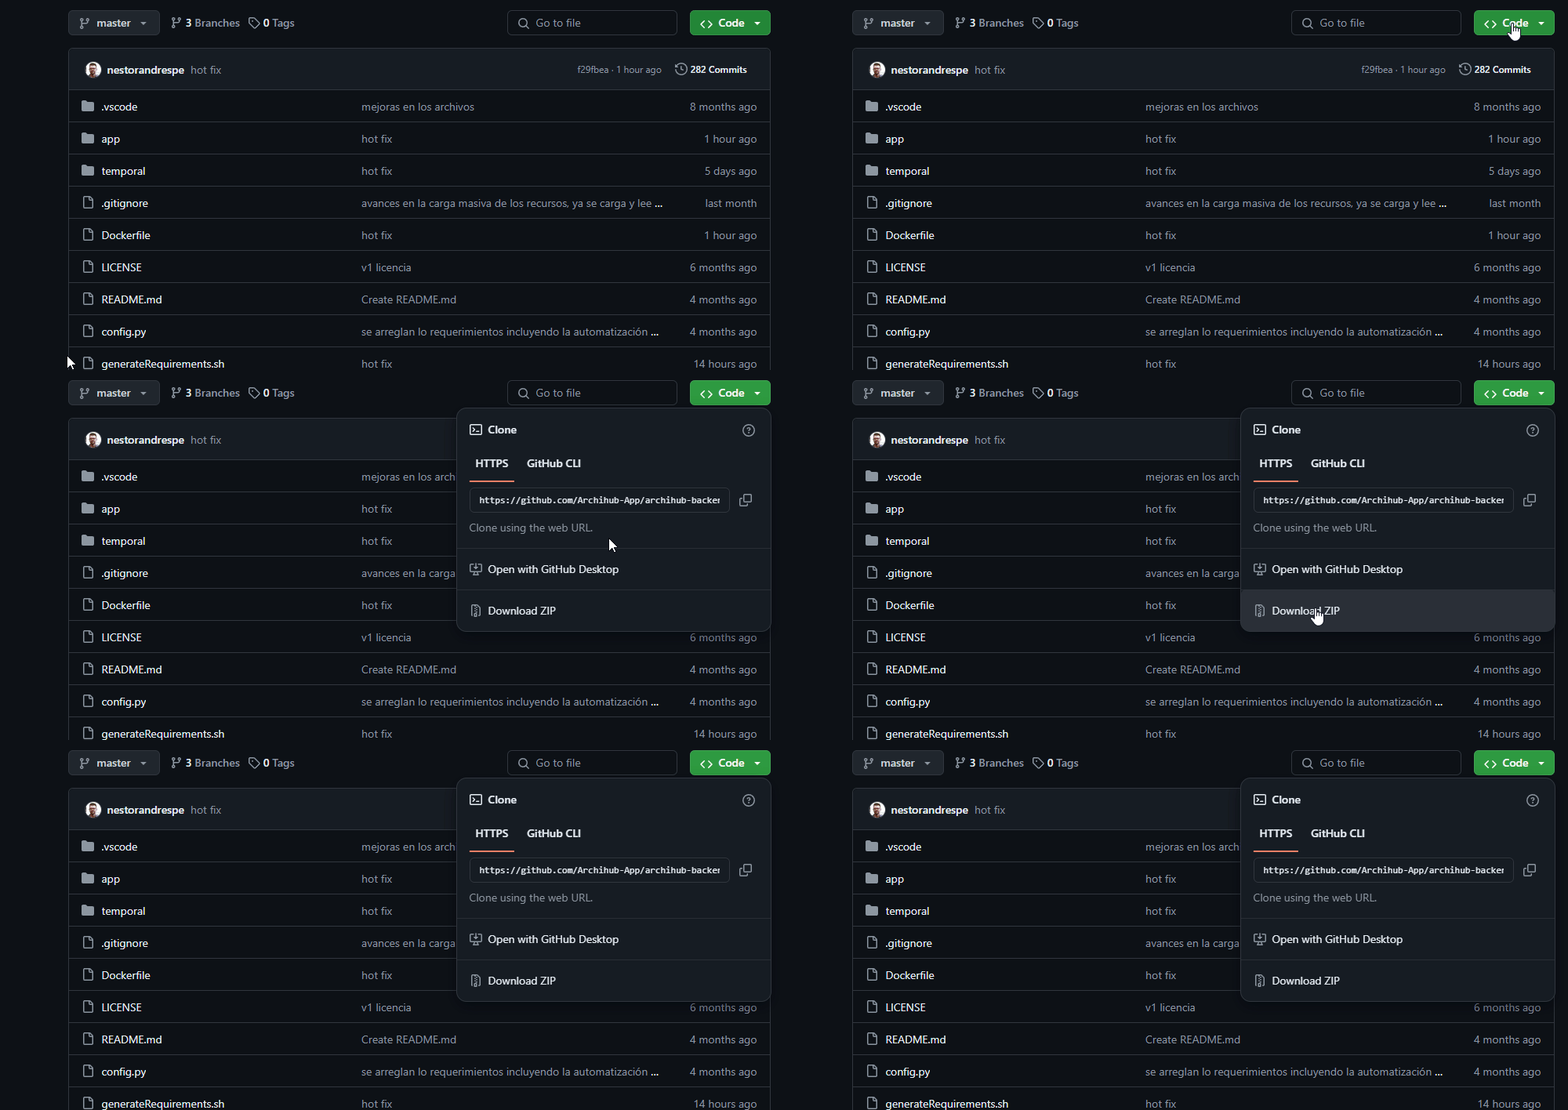
Section titled “Download the application backend”As we mentioned before, it is necessary to download the backend code from the repository of the project. You can do it in two ways:
-
Clone the repository
Ventana de terminal git clone https://github.com/ArchiHUB-App/archihub-backend.git backendThis command must be executed inside the
/local-machine/archihub/folder and will create a folder named “backend”. -
Or download the zip

This will allow you to get all the necessary code to configure and run the ArchiHUB backend.
Starting the application
Section titled “Starting the application”-
Execute the deployment command
Ventana de terminal docker compose up -dThis command will start the deployment of all necessary services.
-
Verify the status of the services You can verify the status in two ways:
Option 1 - Docker Desktop:
- Open the Docker Desktop application
- Go to the “Containers” tab
- Verify that archihub appears as active
Option 2 - Terminal:
Ventana de terminal docker psThis command will show all active containers. You should see the ArchiHUB containers in the list.
-
Access the application
- Open your web browser
- Go to http://localhost/
- The installation may take a few minutes, be patient
Note: If the services don’t appear as active, wait a few minutes and check again. The first installation may take longer.
The default user for this installation is beta and the password is beta.
Once you’re ready, we can continue with the first steps in ArchiHUB.
