Transcribe with WhisperX
The ArchiHUB automatic transcription plugin uses the Whisper model from OpenAI to automatically transcribe audio or video files uploaded to ArchiHUB. To make this work correctly, you need to follow these steps:
Installation
Section titled “Installation”-
Installation of the application: to install the application you must follow the steps mentioned in the installation section.
-
Installation of the plugin: to install the automatic transcription plugin, you must clone the plugin repository in the
pluginsfolder of the application following the steps indicated in the plugin installation section. -
Hugging Face token configuration: the plugin offers the option to generate the “flat” transcription of the voice or to separate the speakers identified in the audio. To use the second option, it is important to have an account on Hugging Face and create a token to use the speaker separation model:
- Once the account is created, you must go to your profile settings and then to Access Tokens. You can also access settings (you must have logged into the account).
- On the access tokens page, click the “Create new token” button.
- Assign a name to the token in the “Token name” text field and select the following permissions:
Repositories: Read access to contents of all repos under your personal namespaceRepositories: Read access to contents of all public gated repos you can accessInference: Make calls to Inference Endpoints
- Save the configuration and copy the access key assigned at the end of the process.
-
Access the diarization repository: access the model repository and request access. Complete the form with the requested information.
-
Environment variables configuration: once the Hugging Face access token is generated, you must paste the token into the ArchiHUB environment variables. To do this, open the .env file in any text editor and look for the
HF_TOKENvariable. If it does not exist, create it and assign the generated key. -
Restart the backend: restart the application backend with the following commands:
docker compose stop archihub_flask_backenddocker compose up --no-deps -d archihub_flask_backendUsing the plugin
Section titled “Using the plugin”Using from the processing view
Section titled “Using from the processing view”Once restarted, access the ArchiHUB interface and go to the processing tab. If the transcription plugin is not enabled, you must enable it from the settings tab and then restart the application with the commands indicated in the previous step.
It is important that the processing row required to execute plugin tasks has been started.
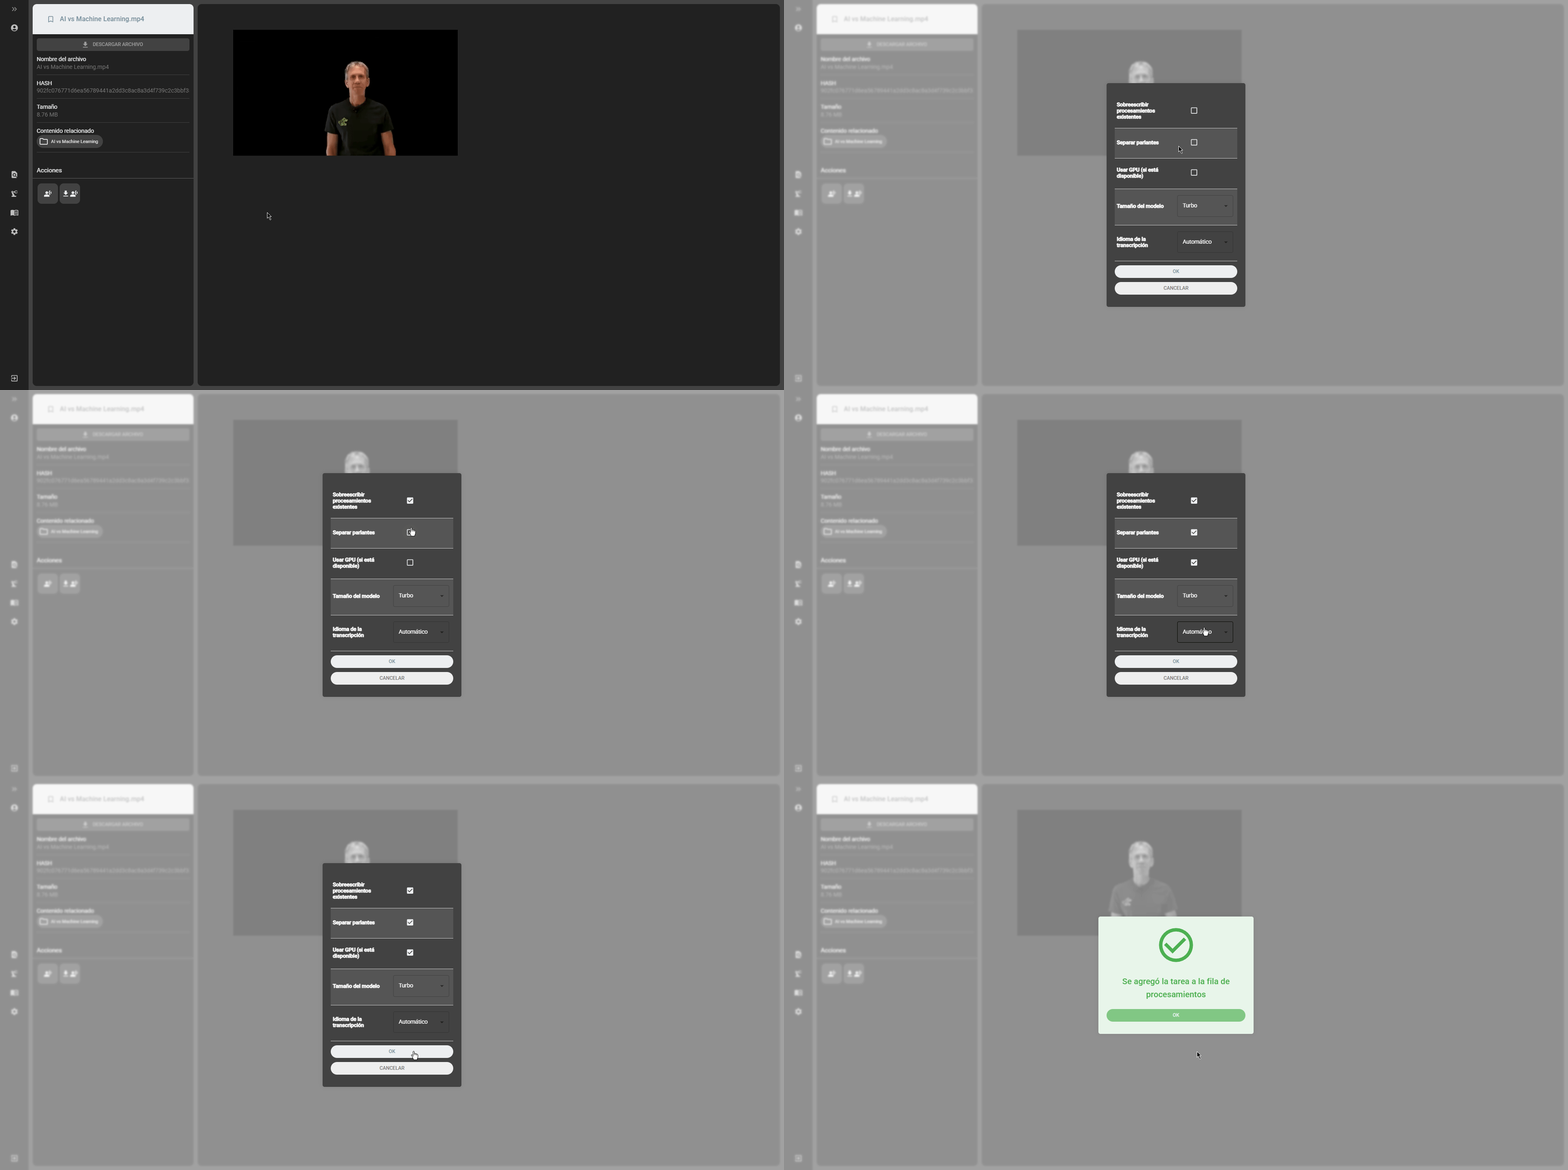
Once in the plugin, select the files you want to transcribe and configure the plugin options:
- Overwrite existing processes: if this option is enabled, the plugin will overwrite existing transcription files.
- Separate speakers: the option to separate speakers enabled uses the token configured in the previous steps of this guide. Its use requires having configured the token.
- Model size: select the model size to use. The model size affects the quality of the transcription and the processing time.
- Transcription language: select the language of the audio to transcribe. By default, the language is set to automatic, so the model will try to identify the language of the audio.
Using from the file view in the cataloging module
Section titled “Using from the file view in the cataloging module”The plugin can also be used from the file view in the cataloging module. To do this, select the audio or video files to transcribe and in the Actions option select Transcribe with Whisper. A popup window will appear with the plugin configuration options. Configure the options and click the OK button to start the transcription process:

Viewing the transcription results
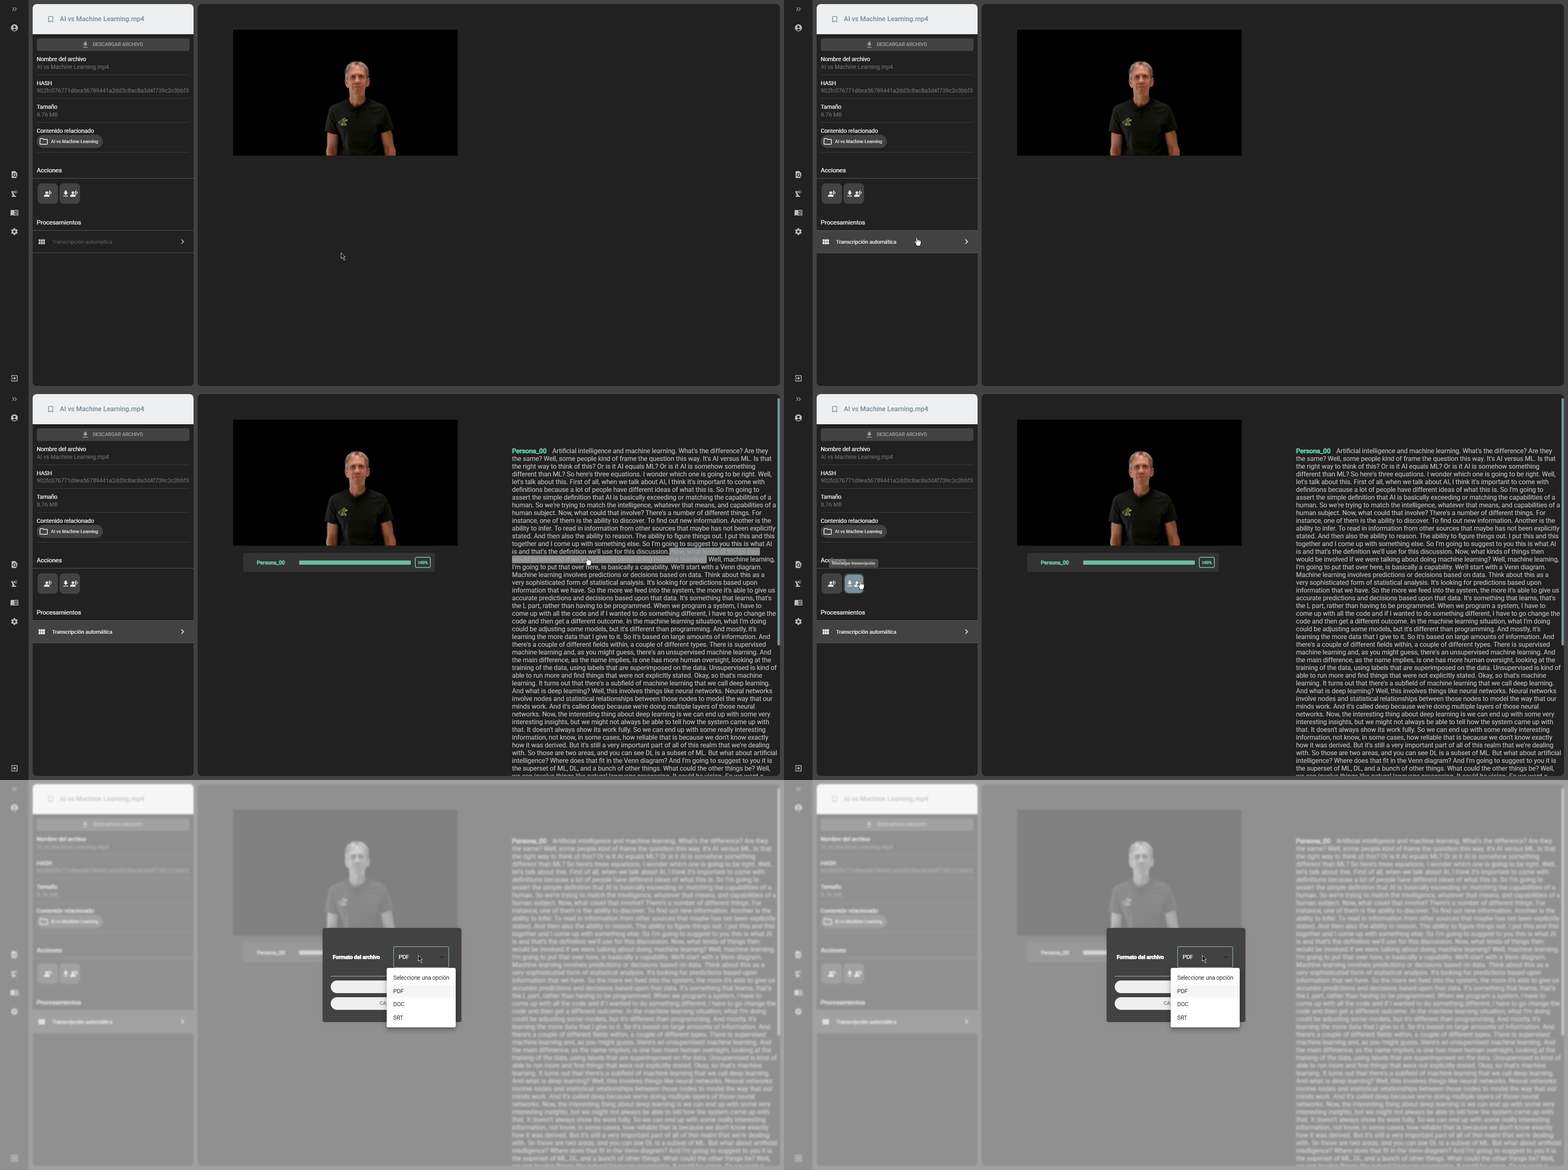
Section titled “Viewing the transcription results”Once the transcription process is complete, you can view the results in the file view in the cataloging module. The transcription files will be displayed in the file list with the transcription icon. Click on the transcription icon to view the transcription text. You can also download the transcription file by clicking on the download icon. The transcription files can be downloaded in formats such as .pdf, .doc, or .srt.

Editing transcripts
Section titled “Editing transcripts”After a transcript is generated, it is possible to edit it from the file view in the cataloging module. There are two editing options:
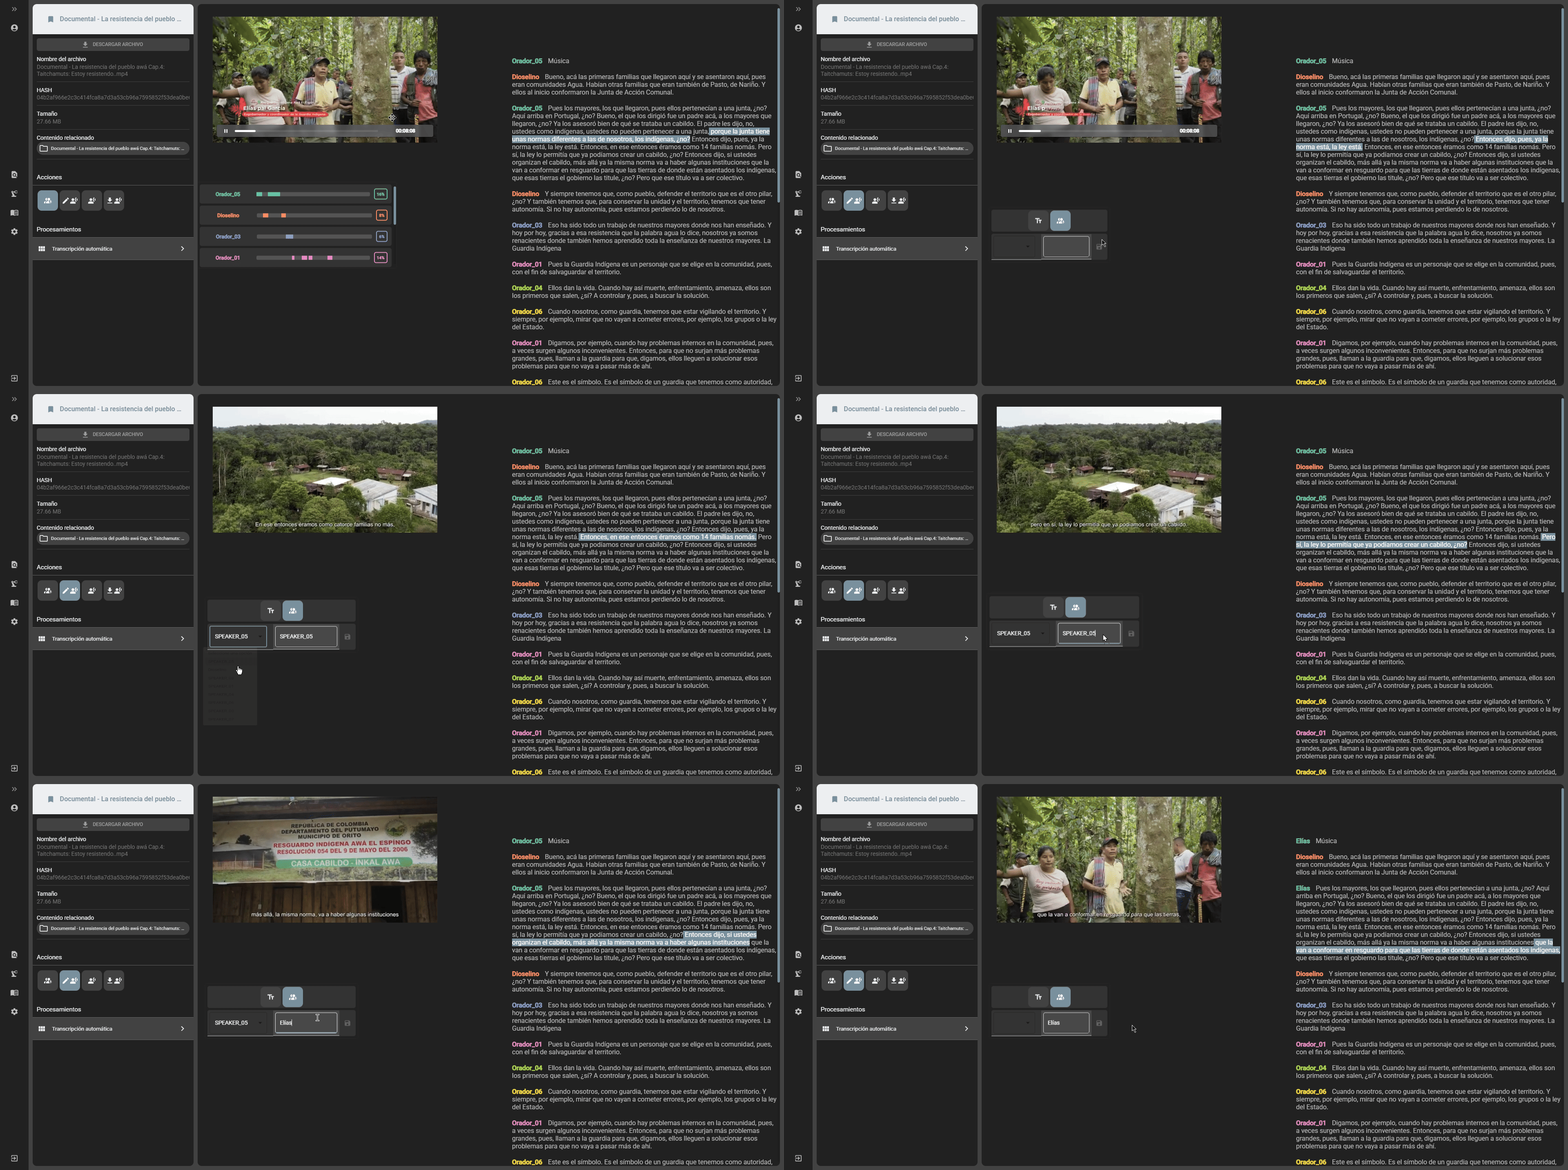
- Speakers edition: if the transcript was generated with the option to separate speakers, it is possible to edit the names of the speakers by selecting the
Edit speakersoption in the edit transcript option:

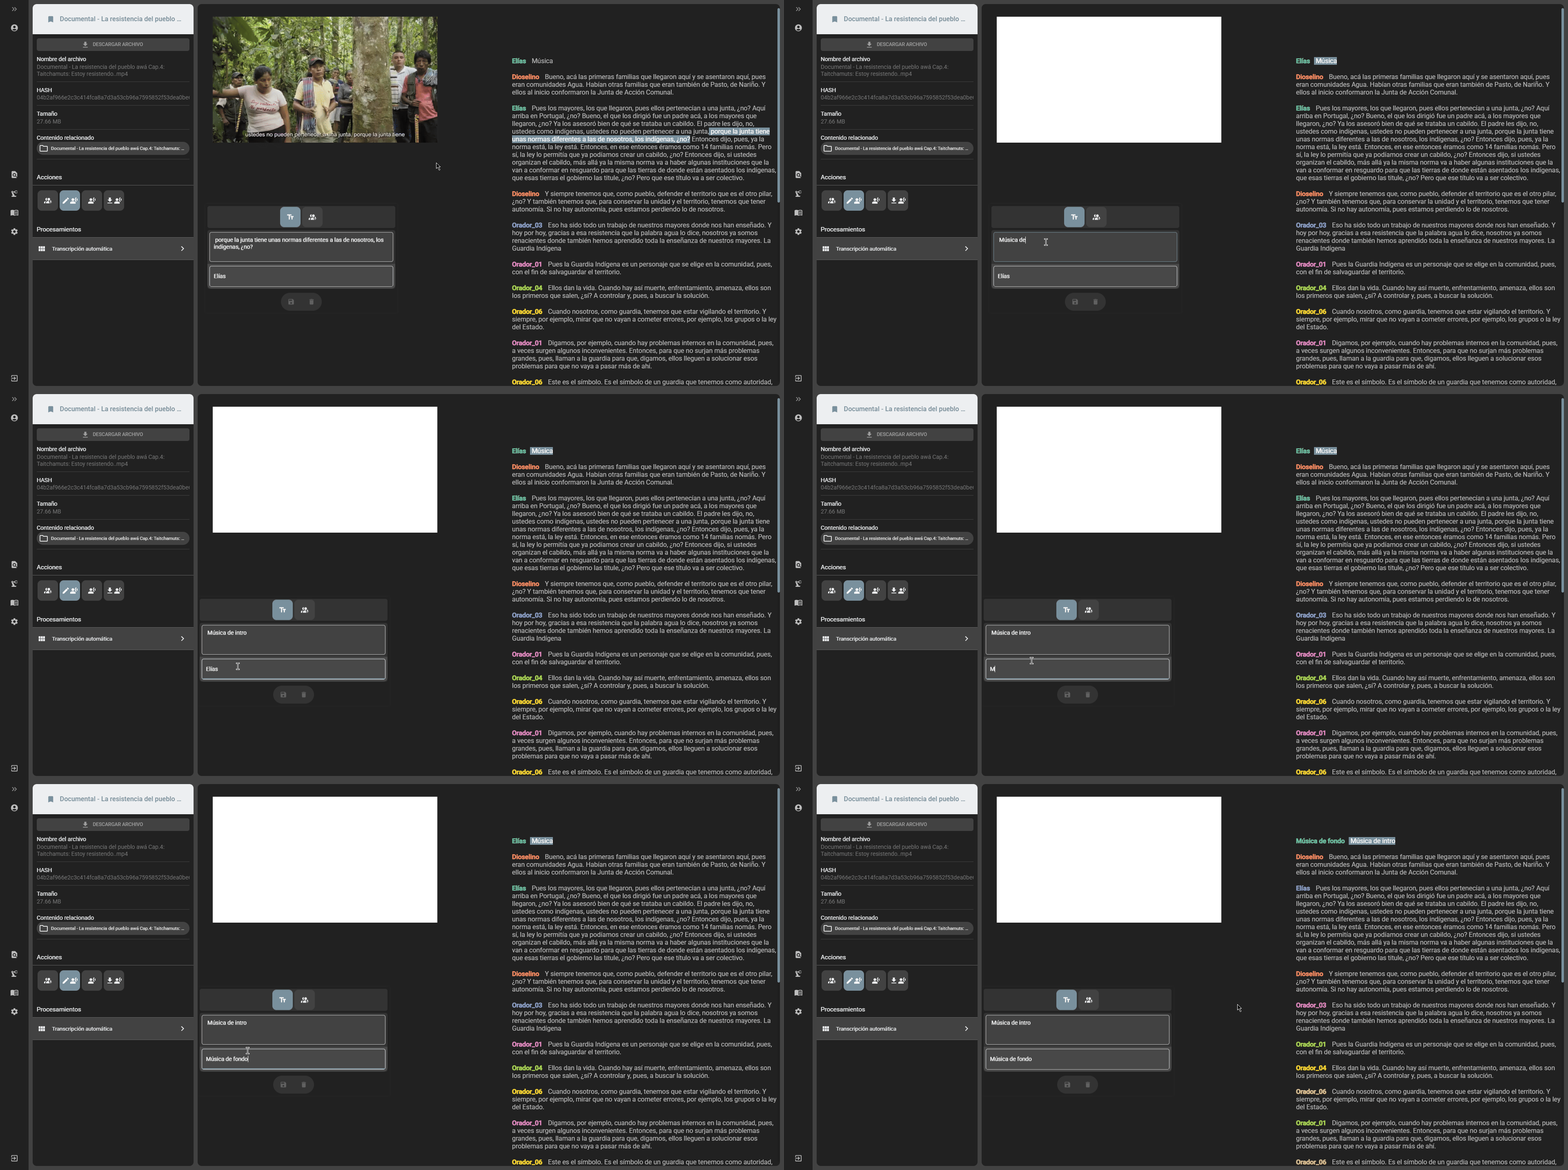
- Transcript edition: it is possible to edit the content of the transcript by selecting the
Edit transcriptoption. To do this, select the text segment you want to edit and modify the content and the speaker if necessary. Once you have finished editing, click theSavebutton to save the changes:

