
Install a plugin
Let’s learn how to install a plugin in ArchiHUB to extend the capabilities of our application.
The plugins that ship with the application
Section titled “The plugins that ship with the application”The plugins installed in your archive from the start come with the backend and cover the basic functionality, such as inventory creation, bulk edits and file processing.
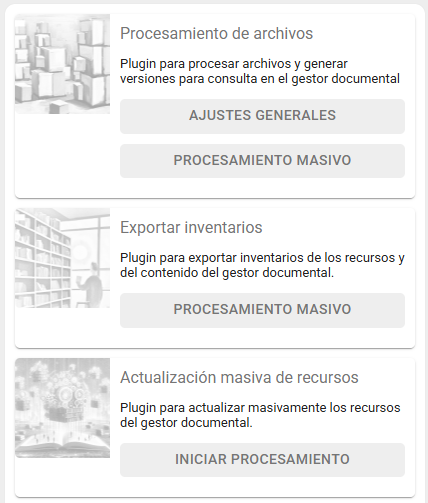
Other plugins are commonly found in a separate repository.
Important: ArchiHUB 2.0 only loads plugins written for version 2.0. A plugin for version 1.x does not work: before installing one, check in its repository that it supports version 2.0.
Installation
Section titled “Installation”-
Copy the plugin: download the plugin and copy its folder into
getting-started/local-machine/archihub/backend/archihub/plugins/. The folder name must be the plugin’s name, for examplearchihub/plugins/transcribeWhisperX. -
Configure the plugin: if the plugin ships a
.env.examplefile, copy it as.envin the same folder and fill in its values. Each plugin’s settings go in its own.env, not in the installation’s.env. -
Rebuild the images: from the
local-machine/archihubfolder, run:docker compose up -d --buildThe build installs the dependencies the plugin declares: its Python packages (
requirements.txt) and any system programs it needs (packages.txt). You do not have to install anything by hand. -
Activate the plugin: go to the Plugins submenu in System administration and activate it.
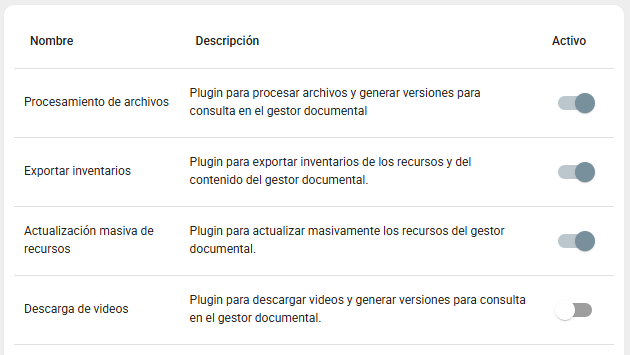
When a plugin is activated or deactivated, the application restarts the backend and the processing nodes to apply the change. There is no need to restart the containers.
We can now go back to the processing menu, where the new plugin should appear as active.
After installing
Section titled “After installing”- Settings changes: each plugin’s
.envis read at startup. After changing it, restart from the system configuration (Reinicio del sistema → Reiniciar backend) or withdocker compose restart. - Code changes: the containers run the plugin code that was copied into the image when it was built. If you update a plugin, run
docker compose up -d --buildagain. - Processing queues: some plugins send their tasks to a specific queue (
high,mediumorlow) that the default node does not consume. If the plugin says so, enable thecelery_worker_queuesservice as explained in the advanced configuration.
That’s all for now. You can explore the general plugin guide to learn more, or learn how to create your own plugin.